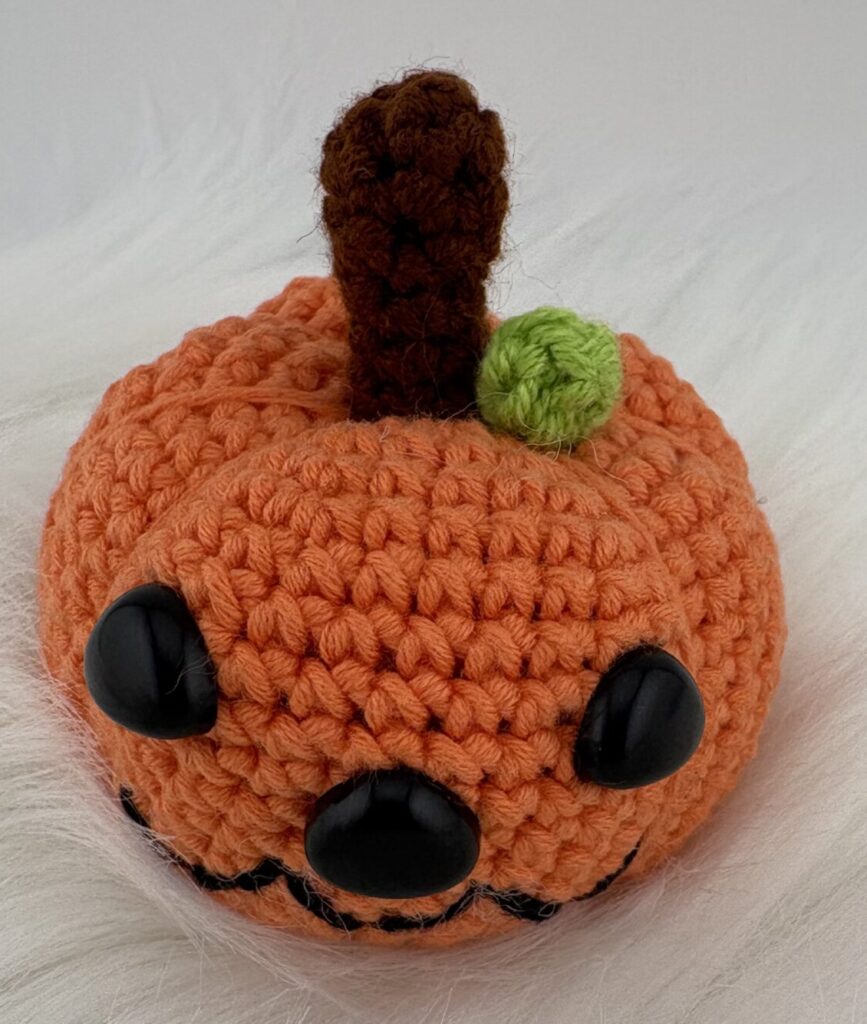
🎃 Pompkin, the Pumpkin Who Laughs at Shadows
Every Halloween night, when the wind whispers and the leaves twirl on the ground, a soft giggle echoes through the garden — it’s Pompkin, the pumpkin who was never afraid of the dark.
While other pumpkins hide from the shadows, Pompkin loves to play with them! He believes that even the spookiest ghost can become a friend with a bright smile.
With his cheerful face and contagious laugh, he lights up the night not with fire, but with joy. And they say that whoever hears Pompkin laughing by their window will have a Halloween full of sweet surprises! 🎃✨
MATERIALS
- Yarn of your choice (I am using cotton – 4-ply). Colors: orange (approx. 50 g), black, brown and green
- 3.0 mm crochet hook
- Fiber fill
- Tapestry needle
- To make the eyes and nose, I used 10 mm safety snouts.
ABBREVIATIONS
- R: row
- MR: magic ring
- sc: single crochet
- dc: double crochet
- inc: increase
- dec: decrease
- ch: chain
- [ ]: number of stitches at each round
- rep: repeat
SIZE: 6 cm
LEVEL: Beginner
TUTORIAL
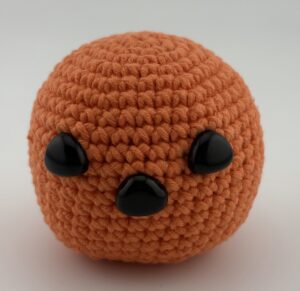
PUMPKIN
With orange:
R1: MR with 6 sc
R2: 6 inc [12]
R3: 1 sc, 1 inc – rep 6x [18]
R4: 2 sc, 1 inc – rep 6x [24]
R5: 3 sc, 1 inc – rep 6x [30]
R6: 4 sc, 1 inc – rep 6x [36]
R7 – R17: 36 sc
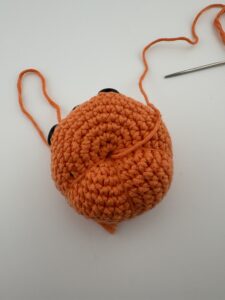
Tip: use safety muzzles for the eyes (insert between rows 9 and 10, with 6 stitches between them) and the nose (insert between rows 11 and 12, centering it between the eyes).
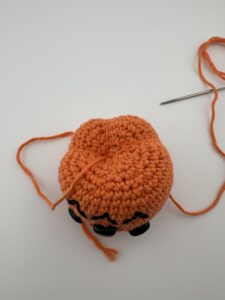
R18: 4 sc, 1 dec – rep 6x [30]
R19: 3 sc, 1 dec – rep 6x [24]
R20: 2 sc, 1 dec – rep 6x [18]
R21: 1 sc, 1 dec – rep 6x [12]
R22: 6 dec
Finish with an inverted MR.

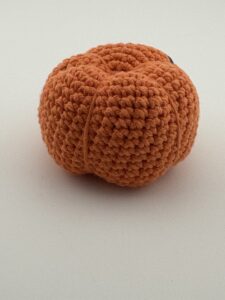
To make the ridges, use a tapestry needle and orange yarn to create the details. Start by inserting the yarn into the bottom of the magic ring and exit with the needle through the hole in the top of the MR. Use the stitch increase marks as a guide and insert the needle into the bottom again. Pull firmly to form the ridge. Repeat this 6 times.
NOTE: On the front, where we made the face, make the ridges on the sides of the eyes.

STEM
With brown yarn:
R1: MR with 6 sc
R2 – R7: 6 sc
Tailpiece and leave a long tail for sewing.
Sew on the top of the pumpkin, using the MR as a base.
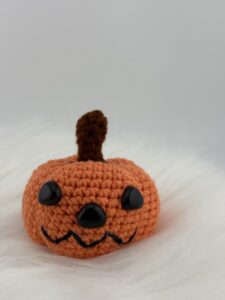
LITTLE LEAF
With green yarn:
5 ch. Starting from the second chain: 1 sc, 2 dc, 1 sc. Finish off and sew next to the stem.