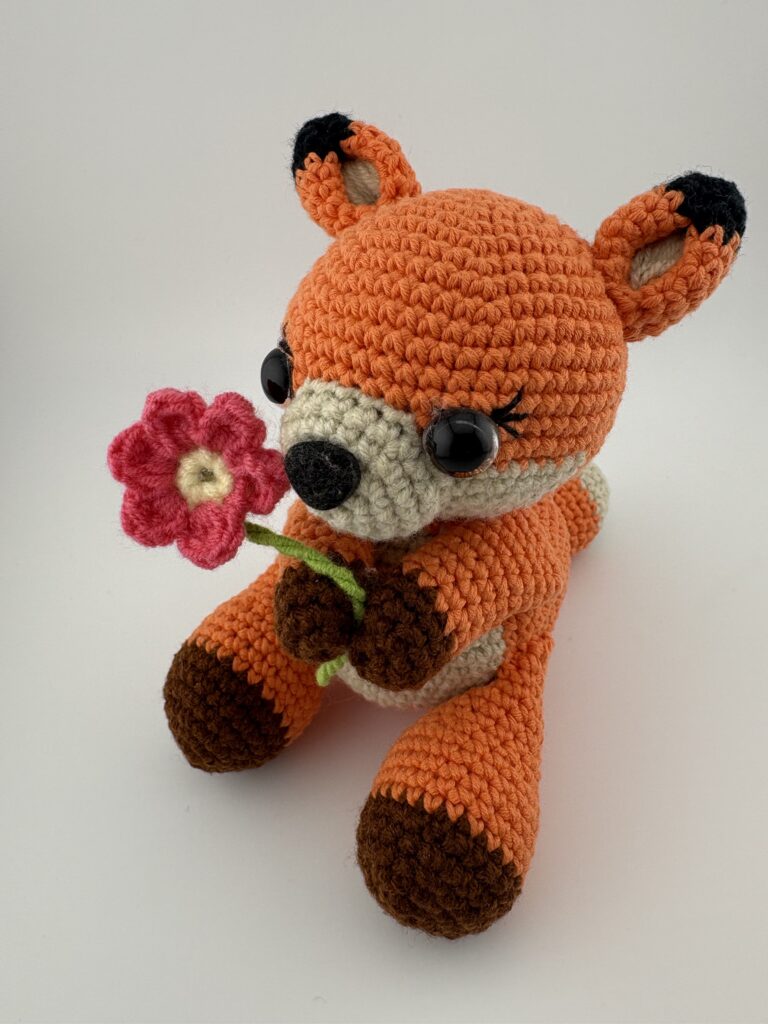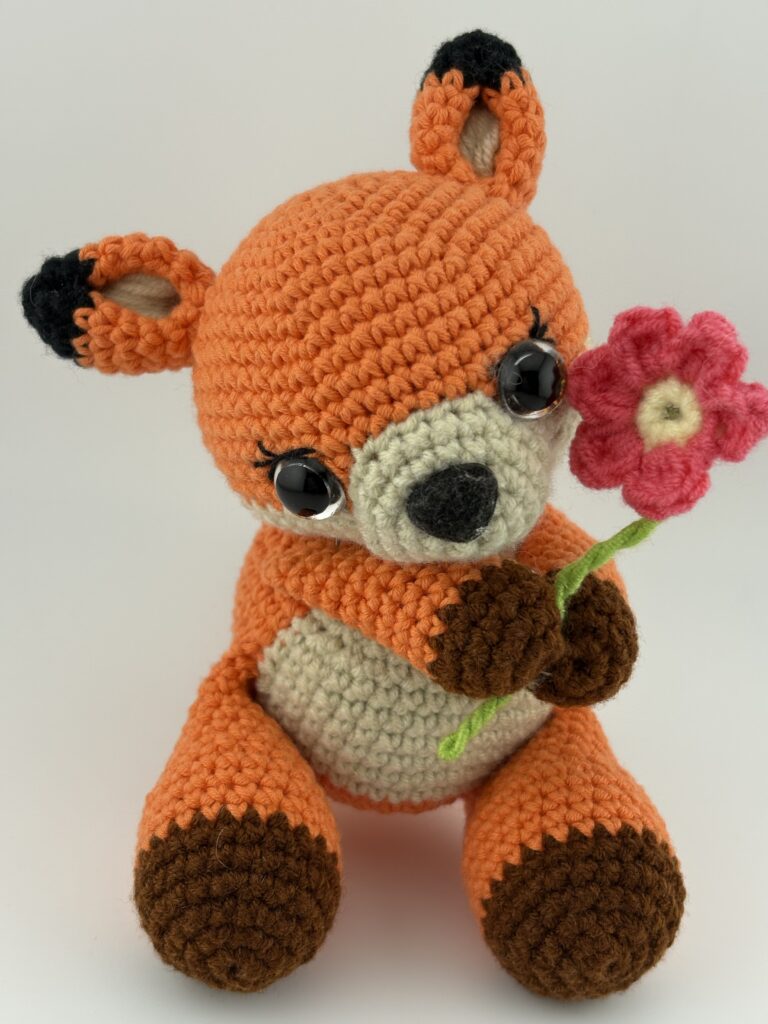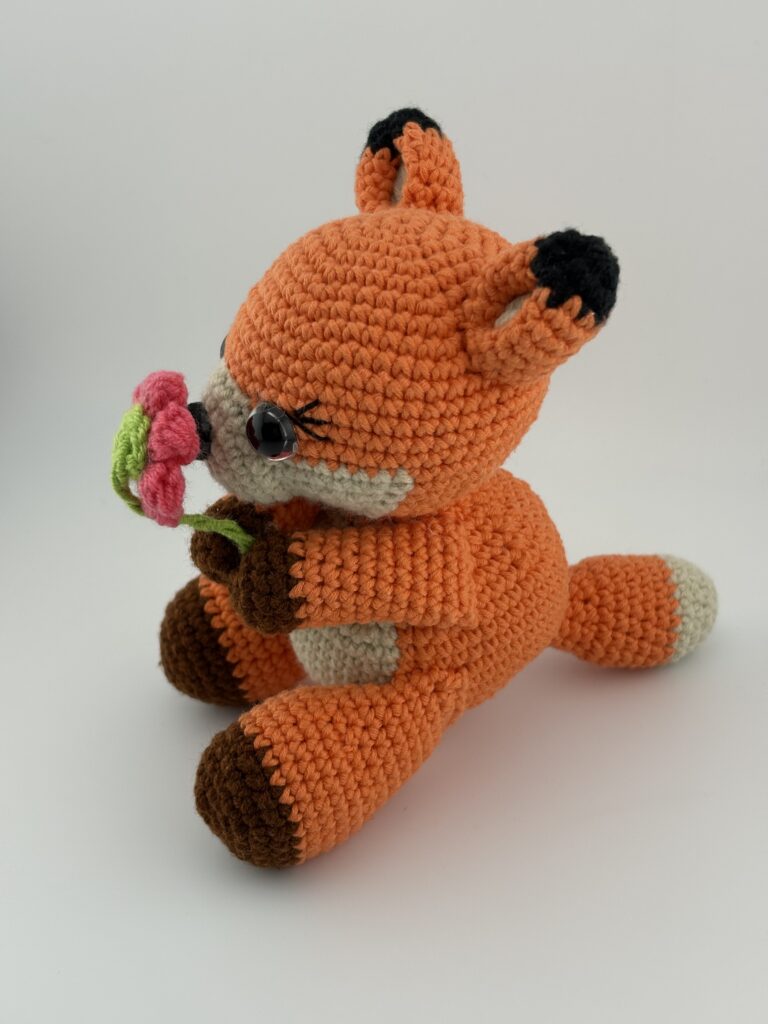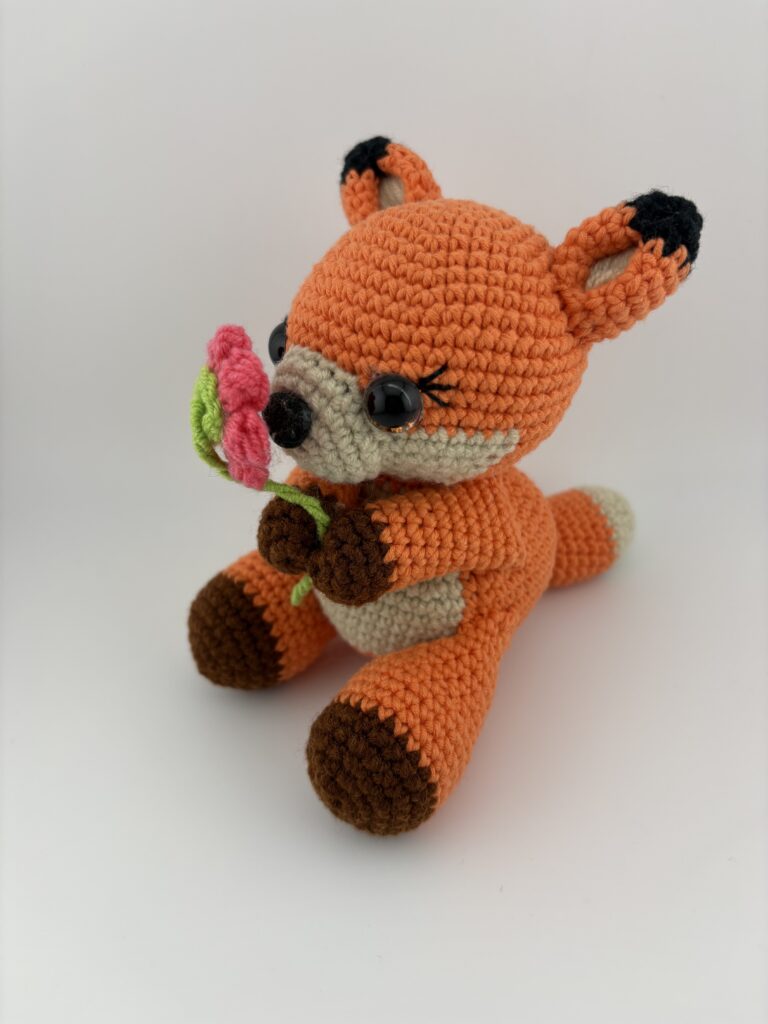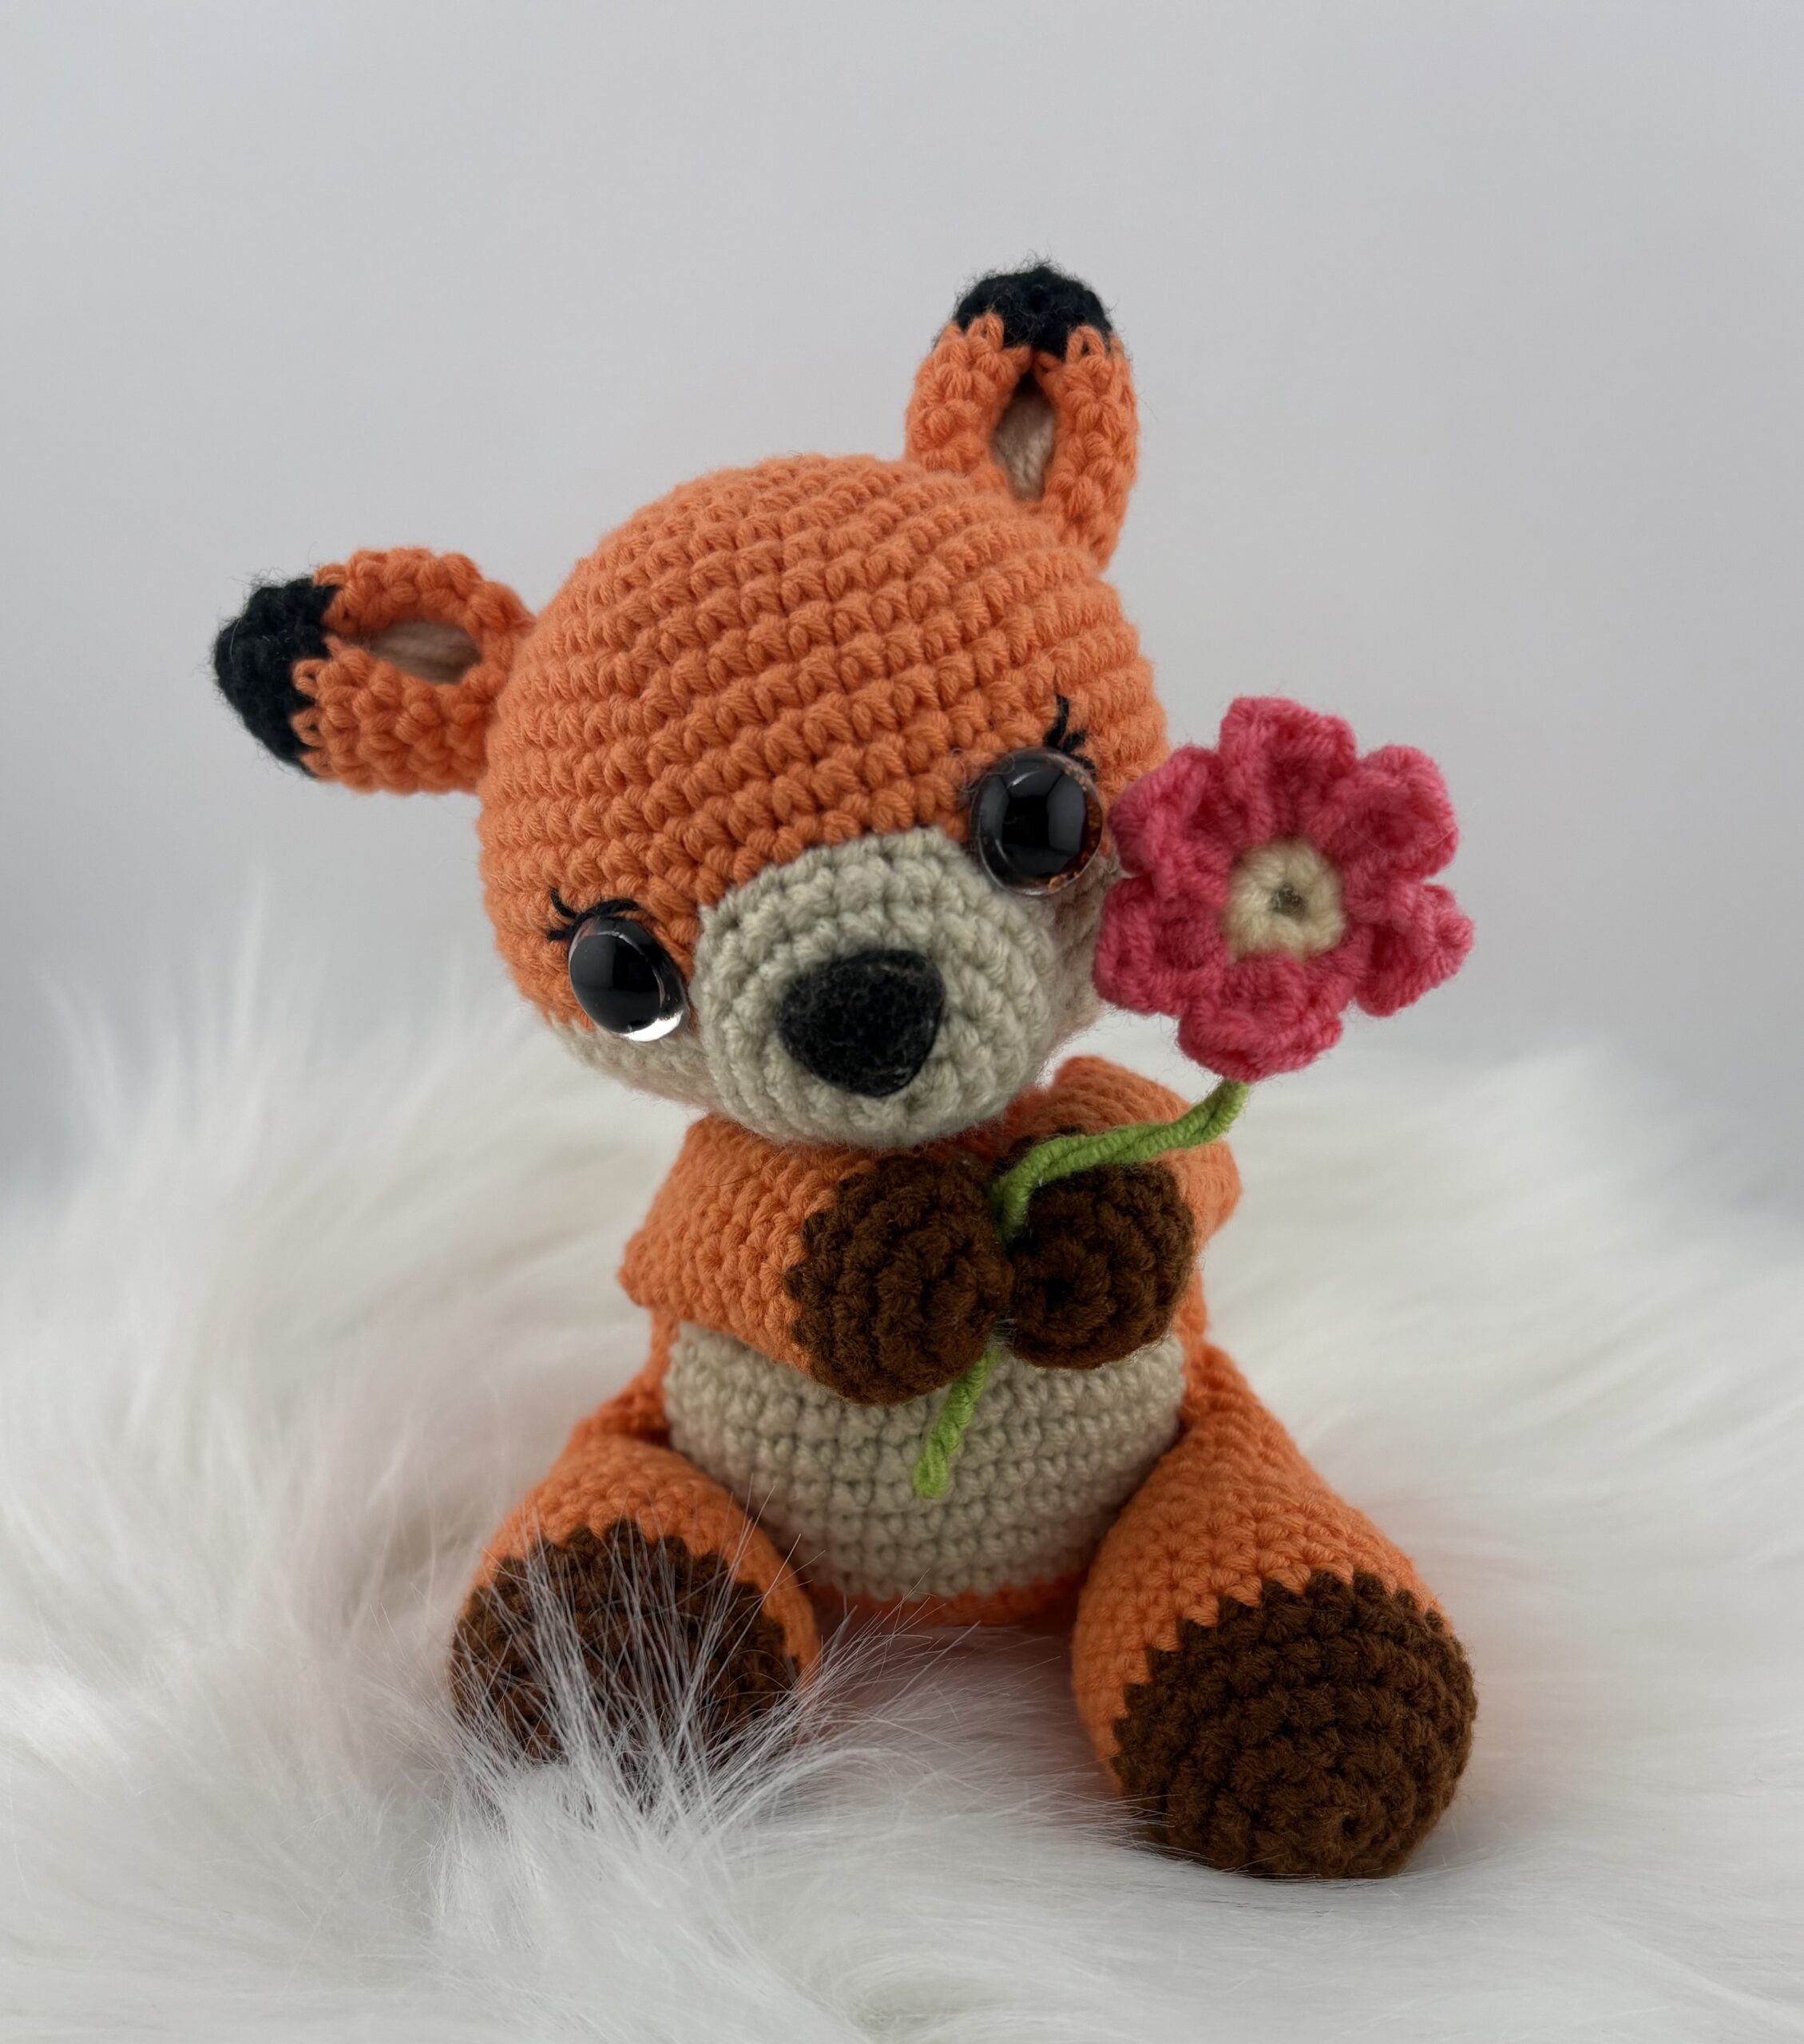
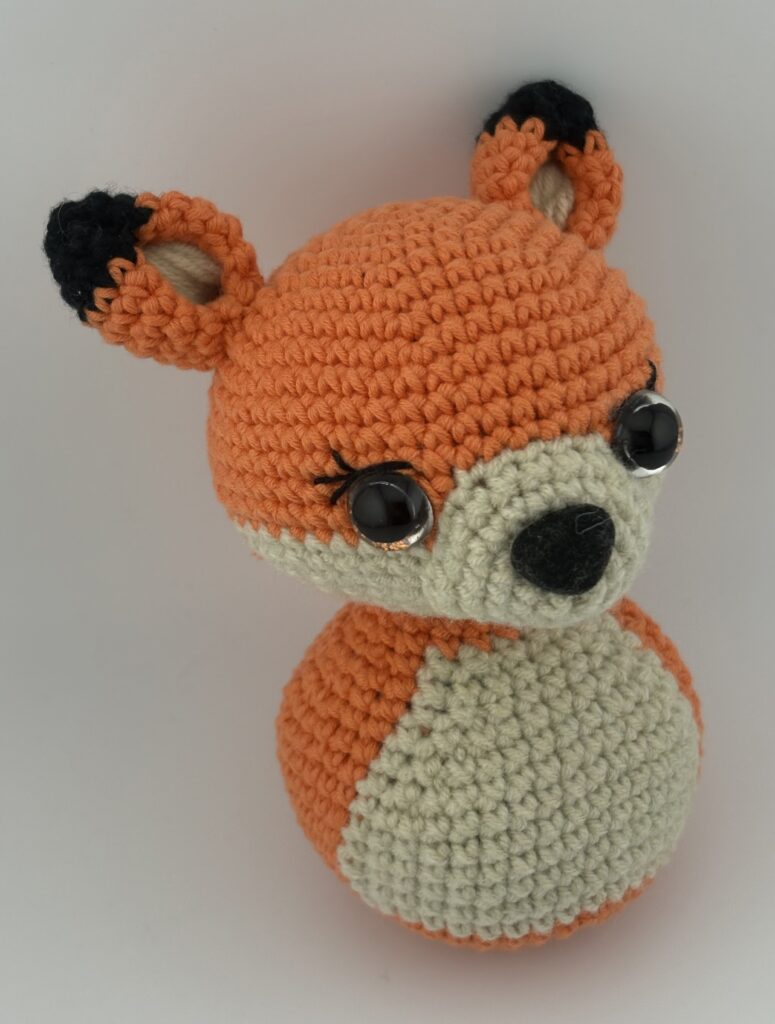
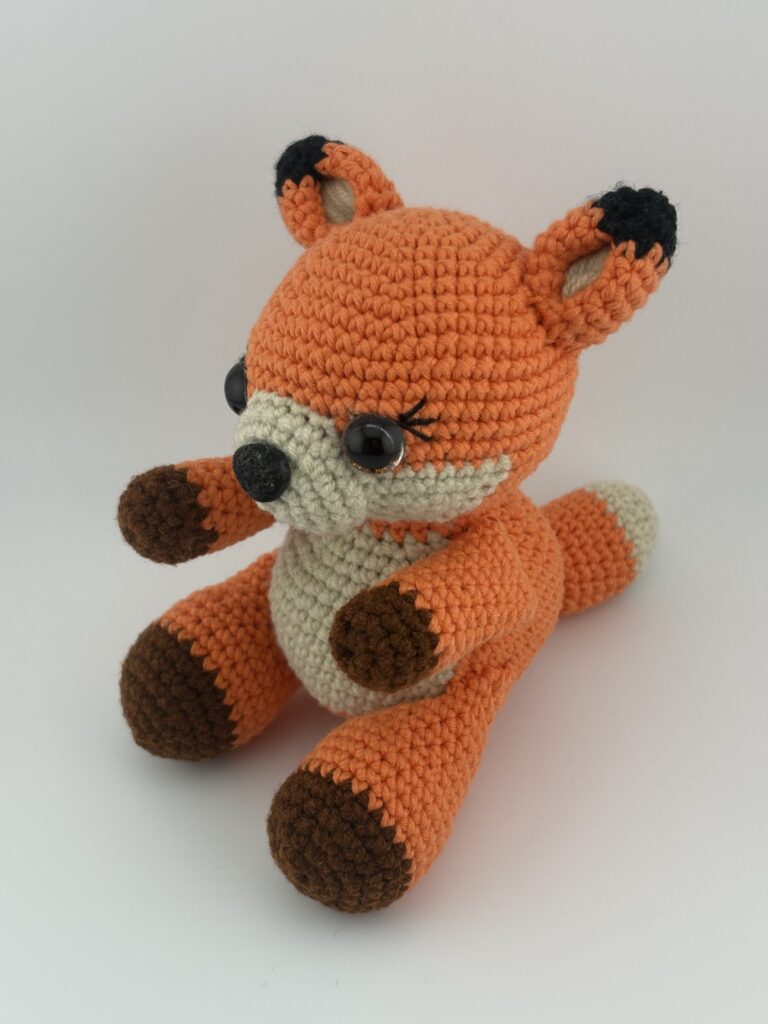
Aurora Foxy, the Little Fox of the Enchanted Forest
Aurora Foxy is a gentle and curious little fox who wakes up with the first light of dawn. She spends her mornings wandering through meadows, collecting flowers to gift to friends. With her big, shiny eyes and warm heart, Aurora Foxy’s mission is simple: to spread kindness, one flower at a time.
MATERIALS
- Yarn of your choice (I am using cotton – 4-ply). Colors: orange (approx. 100 g), beige, brown, black, green, pink and yellow
- Fiber fill
- Tapestry needle
- Safety eyes (12 mm)
- Safety muzzle
- Hot glue gun
- Hot glue sticks
- Wire
ABBREVIATIONS
- MR: magic ring
- R: row
- sc: simple crochet
- dc: double crochet
- inc: increase
- dec: decrease
- ch: chain
- rep: repeat
- slst: slip stitch
- FLO: front loops only
- [ ]: number of stitches at the end of each row
SIZE: 14 cm
LEVEL: Experienced
TUTORIAL
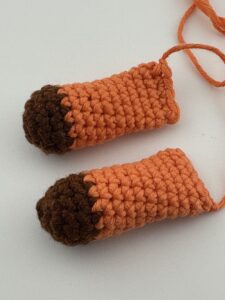
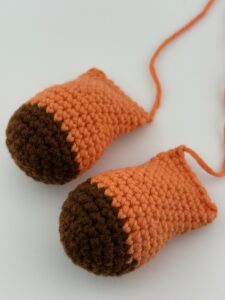
FRONT LEGS (Make 2)
With brown yarn:
R1: MR with 6 sc
R2: 6 inc [12]
R3 – R4: 12 sc
Change to orange yarn:
R5 – R14: 12 sc
Add filling until it reaches about halfway up the arm.
Fold and close the piece with 5 sc. Cut the yarn and leave a long thread for sewing.
Sew the arms between rows 18 and 20, on the sides of the body.
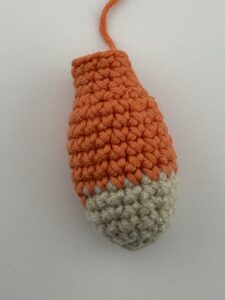
HIND LEGS (Make 2)
With brown yarn:
R1: MR with 6 sc
R2: 6 inc [12]
R3: 1 sc, 1 inc – rep 6x [18]
R4: 2 sc, 1 inc – rep 6x [24]
R5 – R6: 24 sc
Change to orange yarn:
R7 – R10: 24 sc
R11: 2 sc, 1 dec – rep 6x [18]
R12 – R18: 12 sc
Add filling until it reaches about halfway up the arm.
Fold and close the piece with 5 sc. Cut the yarn and leave a long thread for sewing.
Sew the legs between rows 8 and 10, on the sides of the body.
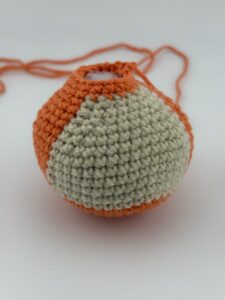
BODY
With orange:
R1: MR with 6 sc
R2: 6 inc [12]
R3: 1 sc, 1 inc – rep 6x [18]
R4: 2 sc, 1 inc – rep 6x [24]
R5: 3 sc, 1 inc – rep 6x [30]
R6: 4 sc, 1 inc – rep 6x [36]
R7: 5 sc, 1 inc – rep 6x [42]
R8: 6 sc, 1 inc – rep 6x [48]
R9 – R14: 48 sc
R15: with beige – 1 sc, 1 dec, 10 sc, 1 dec, 1 sc; with orange – 6 sc, 1 dec – rep 3x; 5 sc, 1 dec [42]
R16: with beige – 1 sc, 1 dec, 8 sc, 1 dec, 1 sc; with orange – 5 sc, 1 dec – rep 3x; 4 sc, 1 dec [36]
R17: with beige – 1 sc, 1 dec, 6 sc, 1 dec, 1 sc; with orange – 4 sc, 1 dec – rep 3x; 3 sc, 1 dec [30]
R18: with beige – 1 sc, 1 dec, 4 sc, 1 dec, 1 sc; with orange – 3 sc, 1 dec – rep 3x; 2 sc, 1 dec [24]
R19: with beige – 8 sc; com orange – 16 sc [24]
R20: with beige – 1 sc, 1 dec, 2 sc, 1 dec, 1 sc; with orange – 2 sc, 1 dec – rep 3x; 1 sc, 1 dec [18]
R21 – R22: with orange – 18 sc
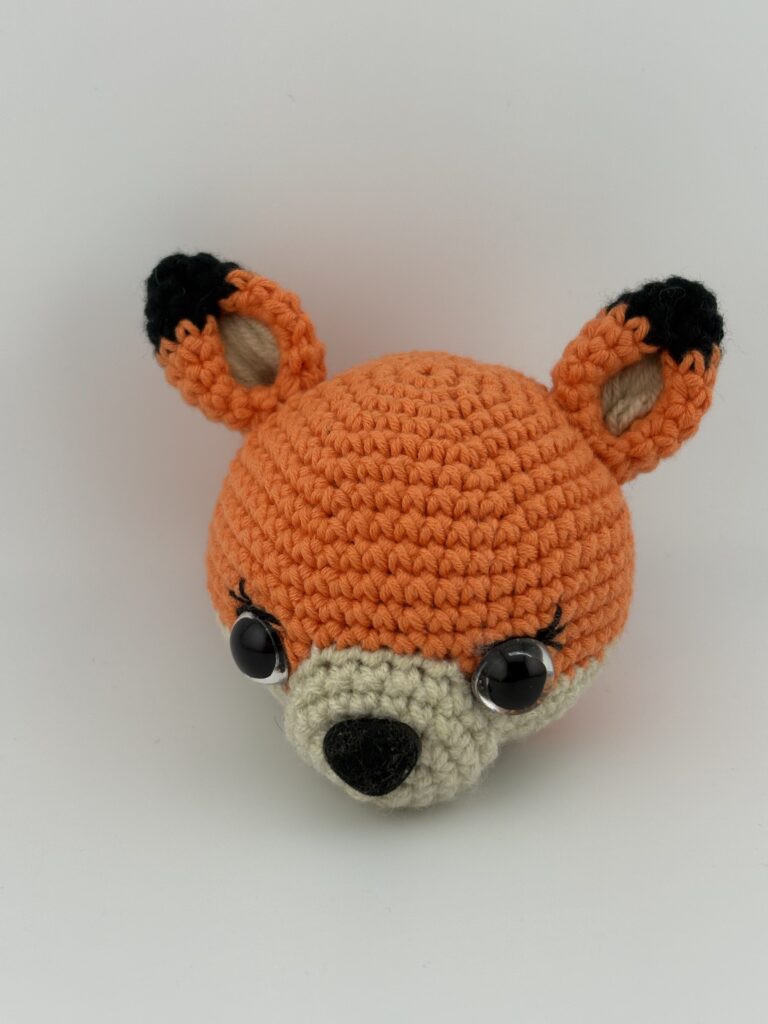
HEAD
With orange:
R1: MR with 6 sc
R2: 6 inc [12]
R3: 1 sc, 1 inc – rep 6x [18]
R4: 2 sc, 1 inc – rep 6x [24]
R5: 3 sc, 1 inc – rep 6x [30]
R6: 4 sc, 1 inc – rep 6x [36]
R7: 5 sc, 1 inc – rep 6x [42]
R8: 6 sc, 1 inc – rep 6x [48]
R9 – R14: 48 sc
Now, let’s work also with beige yarn.
R15 – R16: 12 sc with orange, 24 sc with beige, 12 sc with orange.
Insert the eyes between rows 13 and 14. Be sure to leave 8 beige stitches on each side and 8 in the center. Embroider the eyebrows above the eyes, between rows 10 and 11.
Following the color change at exactly the same stitches in rows 15 – 16, keep making the decreases.
R17: 6 sc, 1 dec – rep 6x [42]
R18: 5 sc, 1 dec – rep 6x [36]
R19: 4 sc, 1 dec – rep 6x [30]
R20: 3 sc, 1 dec – rep 6x [24]
R21: 2 sc, 1 dec – rep 6x [18]
Cut the beige yarn and hide it.
With orange:
R22: 18 sc
Tailpiece and hide the yarn.
Add filler.
Sew the head to the body.
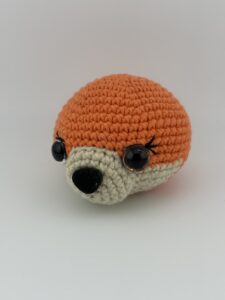
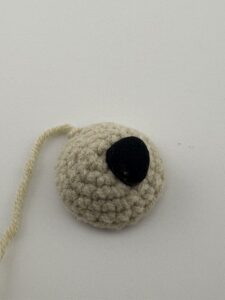
MUZZLE
With beige yarn:
R1: MR with 6 sc
R2: 6 inc [12]
R3: 1 sc, 1 inc – rep 6x [18]
R4: 8 sc, 1 inc – rep 2x [20]
R5: 20 sc
Tailpiece and leave a long thread for sewing.
Sew the muzzle between rows 12 and 18. Embroider or add a muzzle with a safety lock between rows 1 and 4. Before finishing the seam, put a little filler.
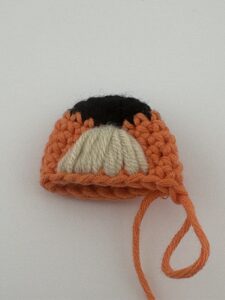
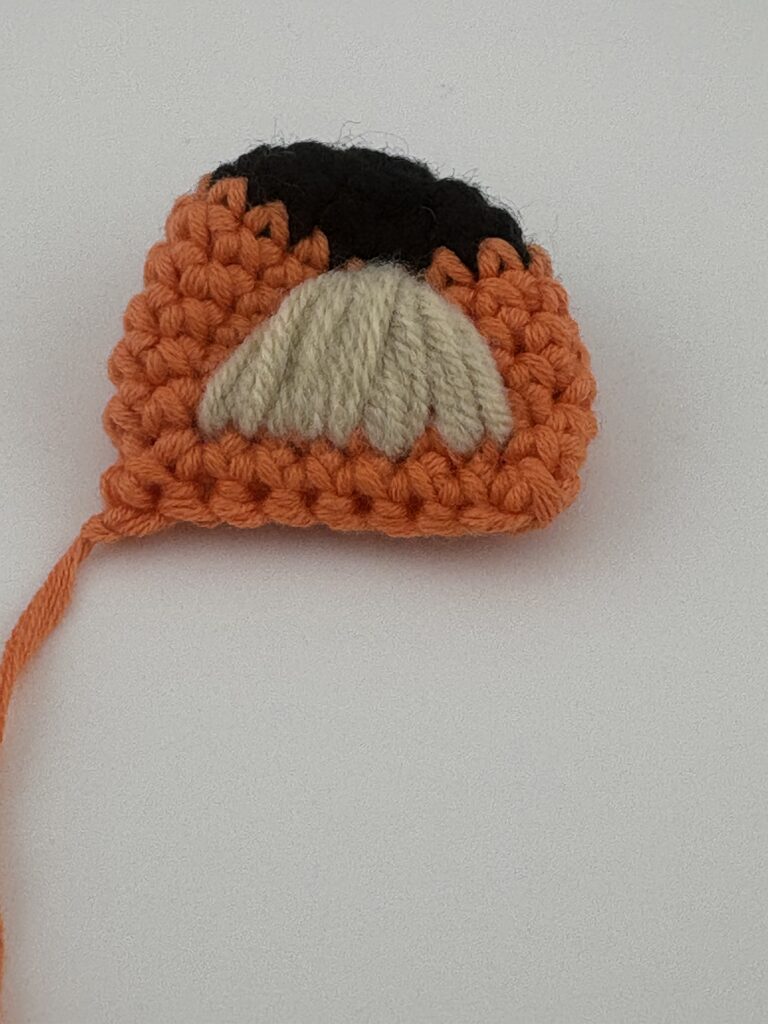
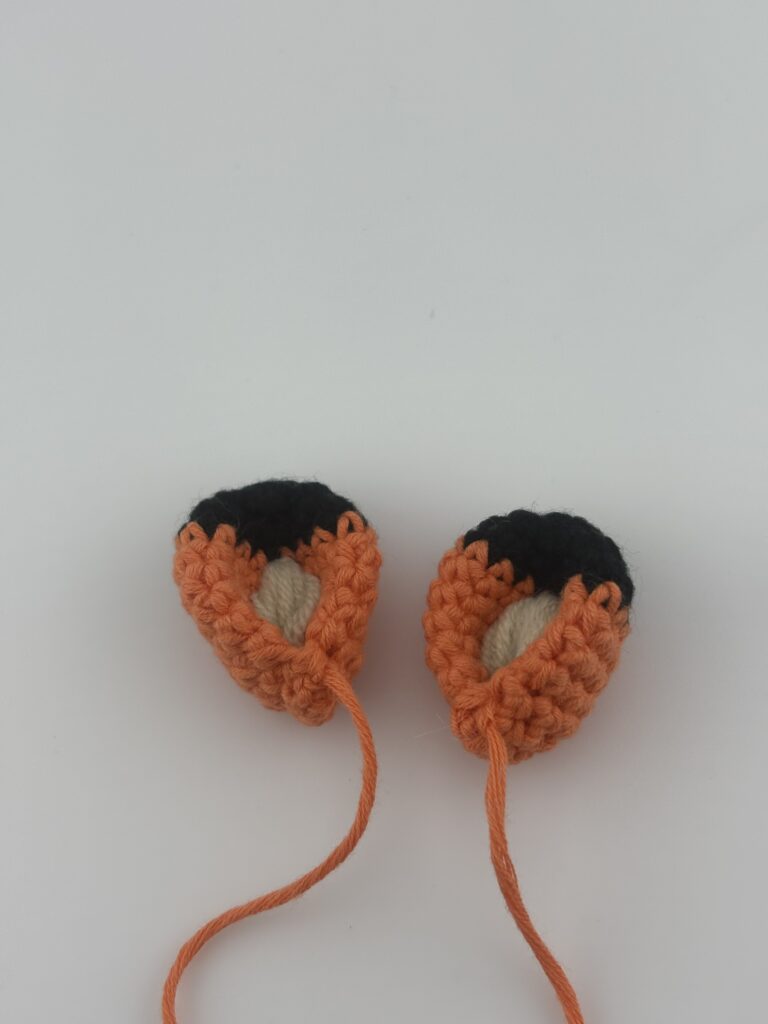
EARS (Make 2)
With black yarn:
R1: MR with 6 sc
R2: 6 inc [12]
R3: 1 sc, 1 inc – 6x [18]
Change to orange yarn:
R4 – R9: 18 sc
Now, let’s do a embroidery using beige yarn on the inside of the ear. Let’s make a kind of triangle.
After finishing the embroidery, fold and close the piece with 8 sc.
TAIL
With beige yarn:
R1: MR with 6 sc
R2: 6 inc [12]
R3: 12 sc
R4: 1 sc, 1 inc – rep 6x [18]
R5: 18 sc
Change to orange yarn:
R6 – R11: 18 sc
R12: 1 sc, 1 dec – rep 6x [12]
R13 – R15: 12 sc
Sew it on the back of the fox, between rows 6 and 10.
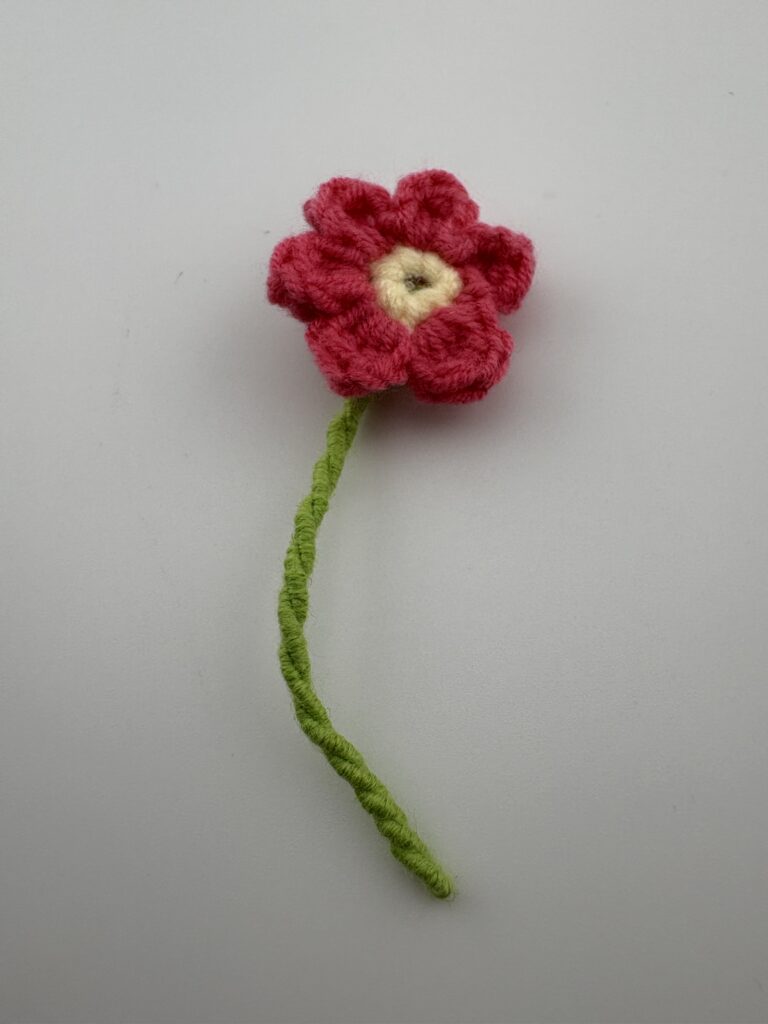
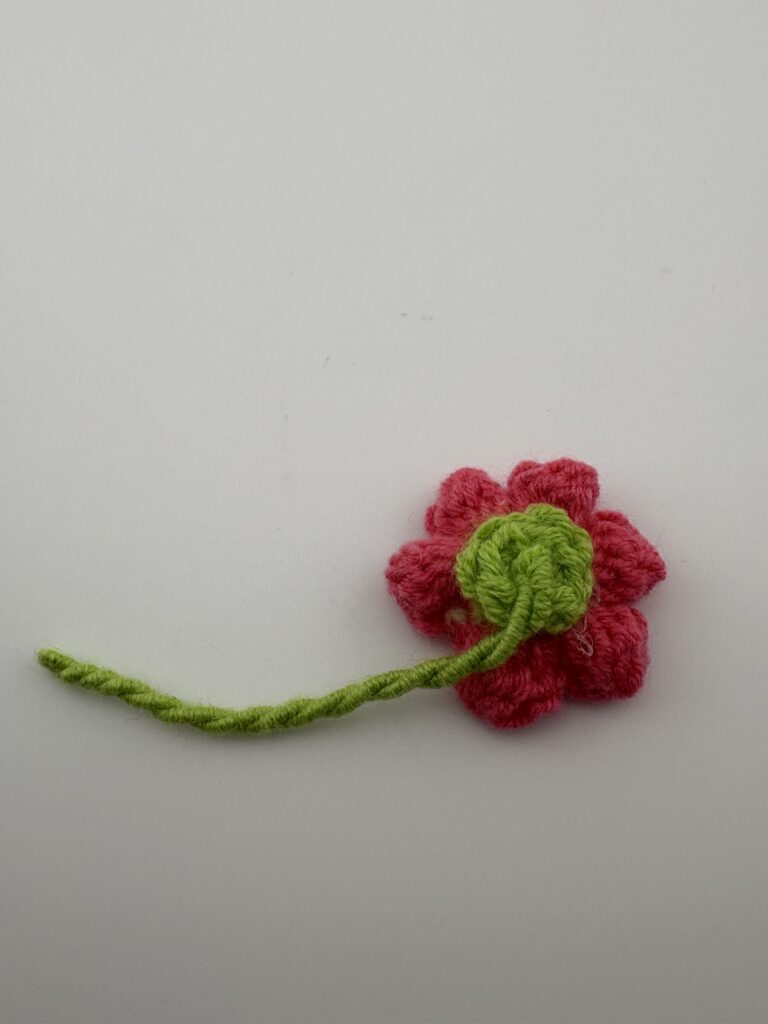
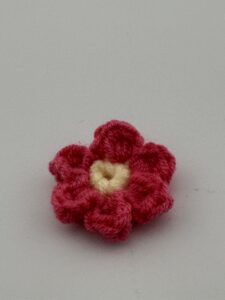
FLOWER
With light yellow:
Magic ring with 6 sc.
Change to pink:
For the petals we will make puff stitches.
Do 2 chains, work 4 dc in the same stitch of the magic ring, but do not complete them. You need to have all 4 dc on your needle to finalize the stich. When you have the 4 stitches on the needle, finish and make 2 chains, making a slst in the same stitch. Repeat another 5x.
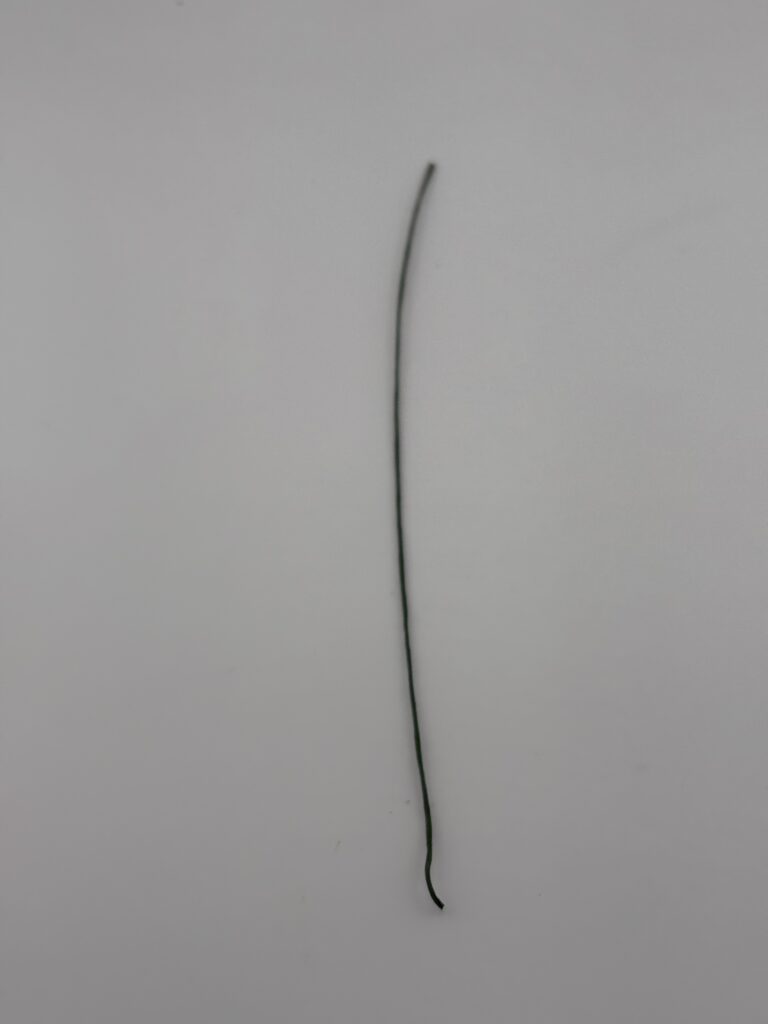
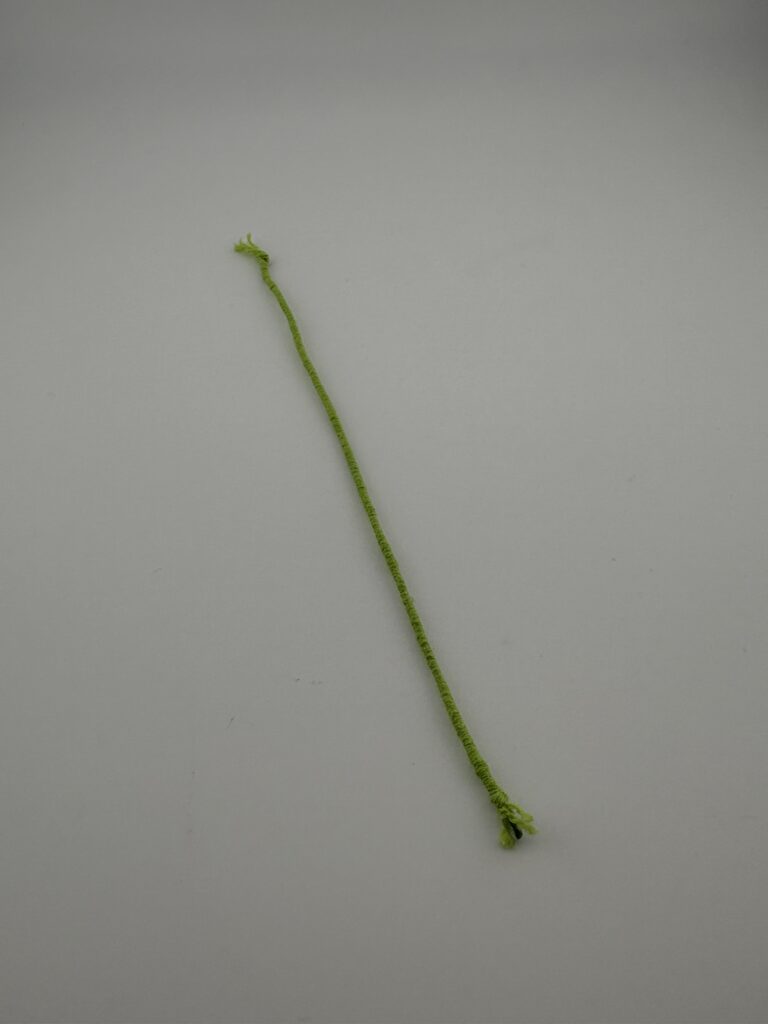
STEM
We will use a wire of approximately 15 cm. With the help of hot glue, glue green wool to the tip and wrap it to the end of the wire. Glue the other end. Now we will bend the wire in the middle and twist it to the end.
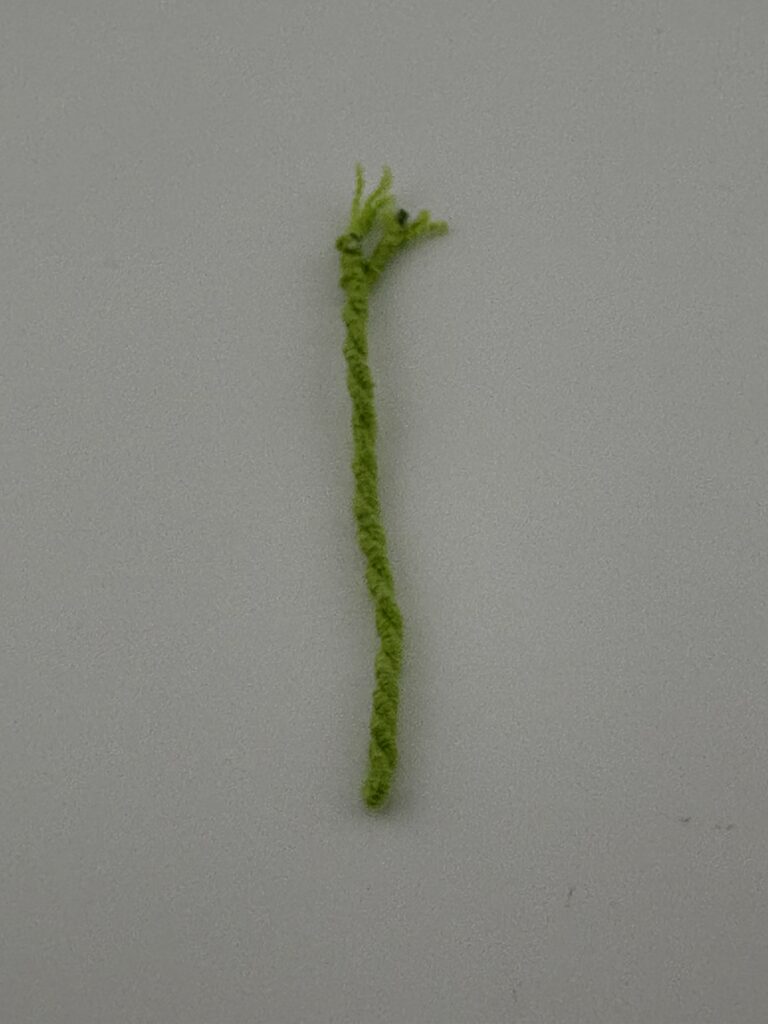
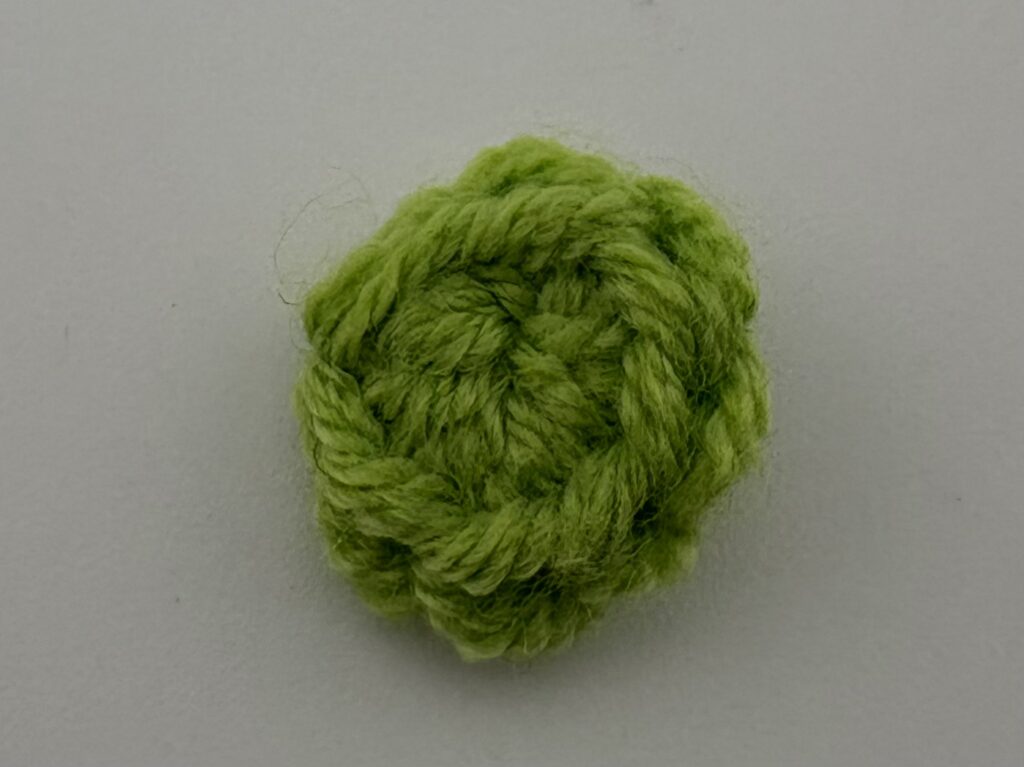
SEPAL
With green yarn, we will make 8 sc in the magic ring. Tailpiece and hide the yarn.
Now, we will pass the two ends of the wire through the middle of the sepal and bend the ends. With hot glue, we will glue the sepal and stem to the flower.
Now, just glue or sew the flower between Aurora’s paws and you’re done!